- Press
 or choose in the menu:Fractal | Bitmap Properties....
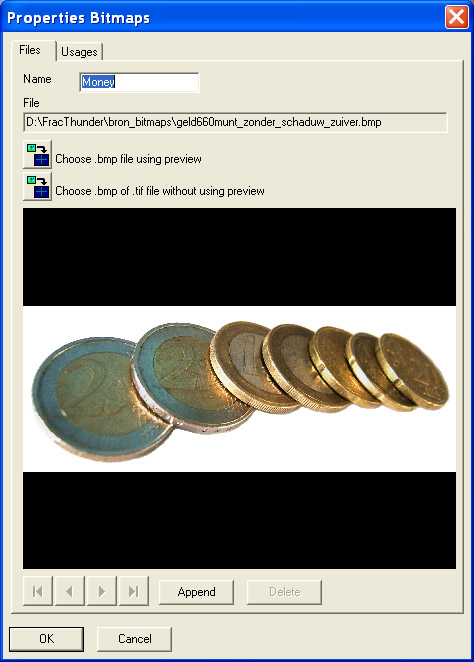
 - In the new dialogbox select tab Files.
- Do the actions: importing, browsing and removing bitmap.
- Press button OK, if you are finished.
To understand this algoritm, you can see a walking point as a walking pipet. At the start of a walk. The pipet is empty having no color.
While walking, the pipet touches a part of the picture it will take the color of the touched part of the picture.
Note that this "pipet" has nothing to do with the global pipet of the FracThunder.
The normal algoritm is extendable by adding existing pictures (bitmaps).
While a point is "stepping" through the space, you can place existing one or more picture in that space.
When while Walking, the stepping point accidentely z(n) comes somewhere in the bitmap,
the color of that place of the picture is taken into the pipet and the stepping of the point is stopped,
because the pipet is full and the color is defined.
The found color is put at the pixel of the Starting Point z(0) of the stepping pixel.
Pieces of a picture can be partly of completely transparant. When the stepping pixel (pipet) comes into such a part of the picture.
The pipet is filled partly with that color, when the pixel is 75 transparent (in sense of strength),
the empty part of the pipet is filled with 75% of the color, so the empty room is 4 times smaller.
When the pipet is (nearly) fill, the walking is stopped and the (mixed) content of the pipet (a mixed color) is put on the pixel of the Starting Point.
or choose in the menu:Fractal | Bitmap Properties....
An Absolute file reference is a reference on it own. Example "D:\fractal\pictures\trees.bmp".
A Relative file reference is a reference seen from a directory. Example "fractals\trees.bmp".
In this case the point is from the Fractal file. When you open fractal file "D:\fractals\christmastree.ftf" and you want to reference to "D:\fractal\pictures\trees.bmp",
the Relative reference is "pictures\trees.bmp", because "D:\fractal\pictures\" is the directory of the fractal file.
You can use Relative file references only when a Fractal file is defined. For example when you create a new Fractal, you cannot use Relative file references at that moment, you must save the fractal first.
Using Relative file references you can only references to files that are inside the same directory or subdirectories as the Fractal file.
You can switch between Absolute and Relative file reference by choosing Absolute or Relative from fractal file in group Reference to file, when possible.
The Succesfully imported file is listed in field File Specified, Absolute or Relative referenced.
The Succesfully imported Absolute referenced file is listed in field File Effective Absolute.
This is importing when you will move one or more fractal and bitmap files.
When you move the fractal files, but leave the bitmap files on the same place, it is better to choose Absolute file references for these bitmap files.
When you move the fractal files and bitmaps files together, it is better to choose Relative file references for these bitmap files.
You can browse through the Bitmaps by pressing one of the buttons  :
:
 : First Bitmap
 : Previous Bitmap
 : Next Bitmap
 : Last Bitmap
or choose in the menu:Fractal | Bitmap Properties....
A Bitmap Usage tells how to put a Imported Bimap (picture) into the fractal.
You can browse through the Bitmap Usages by pressing one of the buttons :
: First Bitmap Usage: Previous Bitmap Usage: Next Bitmap Usage: Last Bitmap Usage
Select name of the Imported Picture in listbox Bitmap.
A picture can be used by more Bitmap usages.
You can define the piece (rectangle) of a complex space in group Bitmap.
Using this rectangle, you can mirror, magnify, stretch and move the selected bitmap.
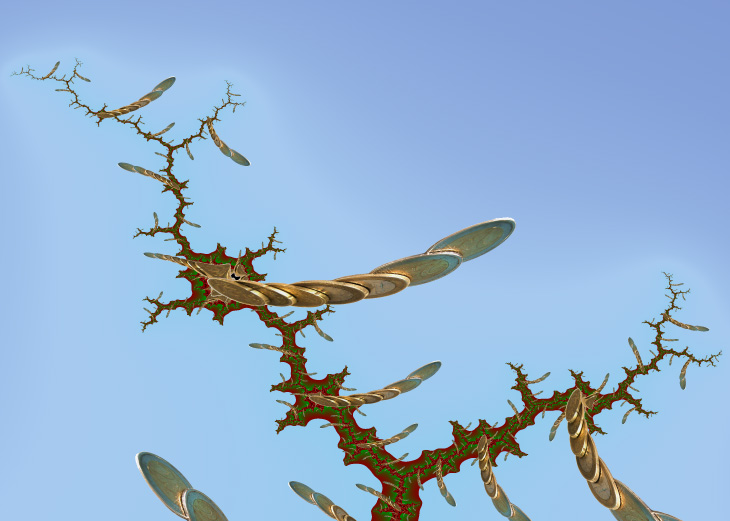
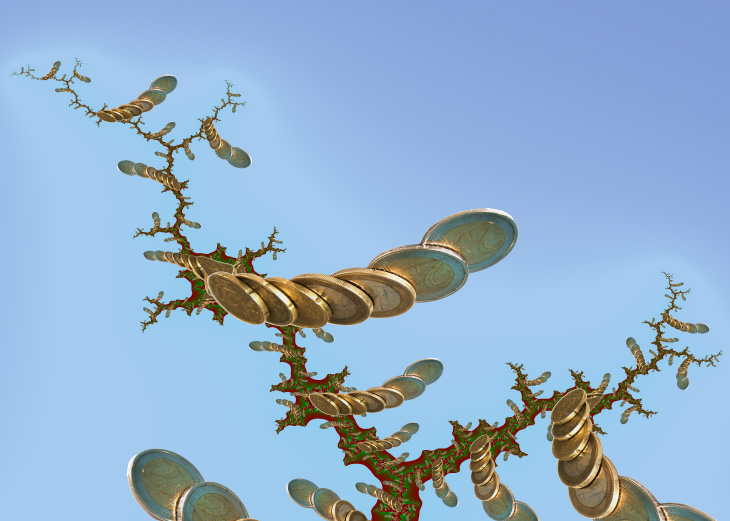
If you import the money, you get much more back!
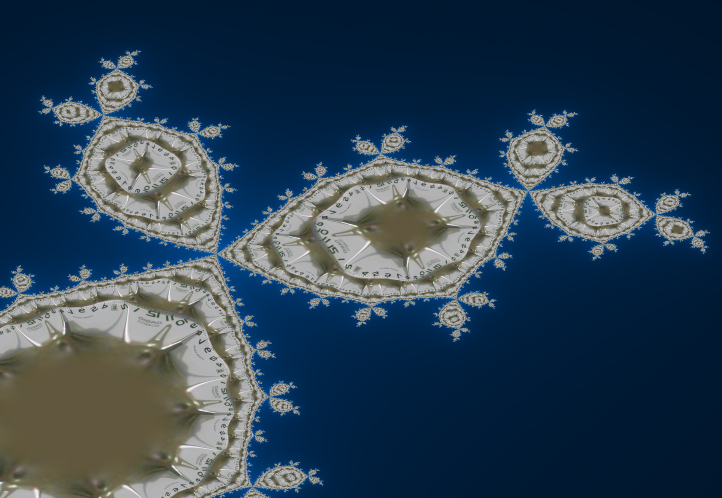
By assigning "-0.55"to Left and "0.05"to Right the smallest coin is put at the center of the complex space,
so in the fractal, that coin is connected to the brown tree itself.
Here is the Moneytree:

You can stretch the coins by making the difference in one dimension bigger or smaller.
Here we make the length of the pile of pile two times longer: Left = "-1.1" and Right = "0.01":
By make also the other dimension two times bigger (Top = "0.2" and Bottom = "-0.2") you coins are two times bigger than of the first Moneytree:
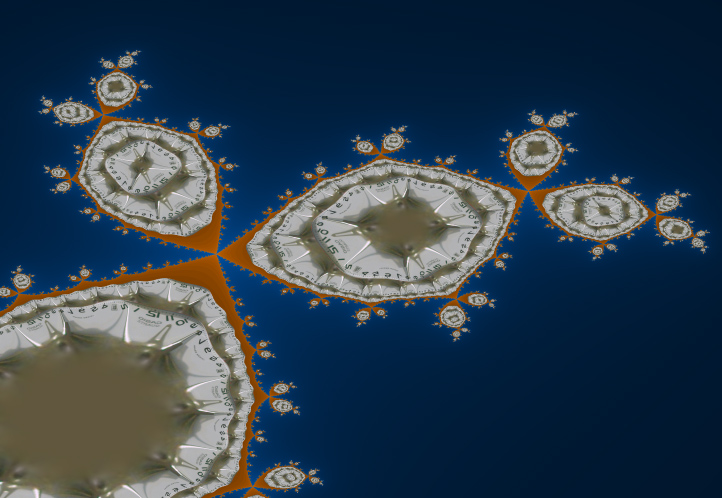
You can mirror by swapping the values of one dimension, in this case Left and Right:

And you can move all coins by adding or substracting the same value to both values of one dimension, here we add "-0.6" to both Left and Right:
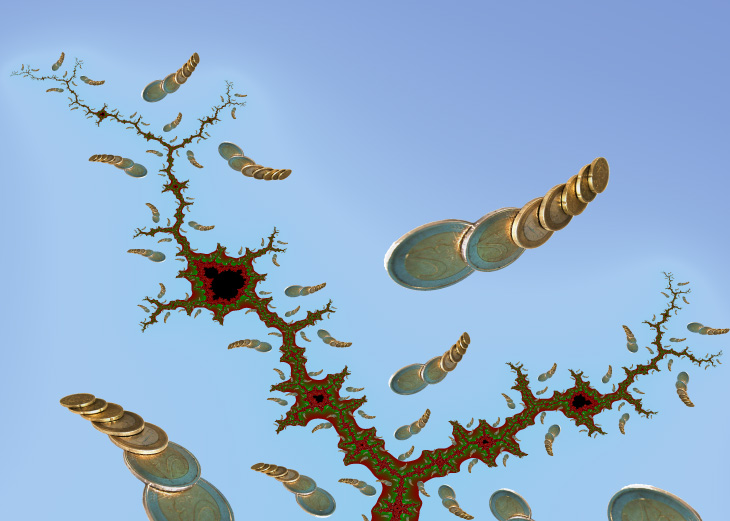
The tree loses all of its infinite money...
You can reduce the number of pictures in the fractal by make a selection of the steps.
Before step n is made, some pictures can be present (visible) of not.
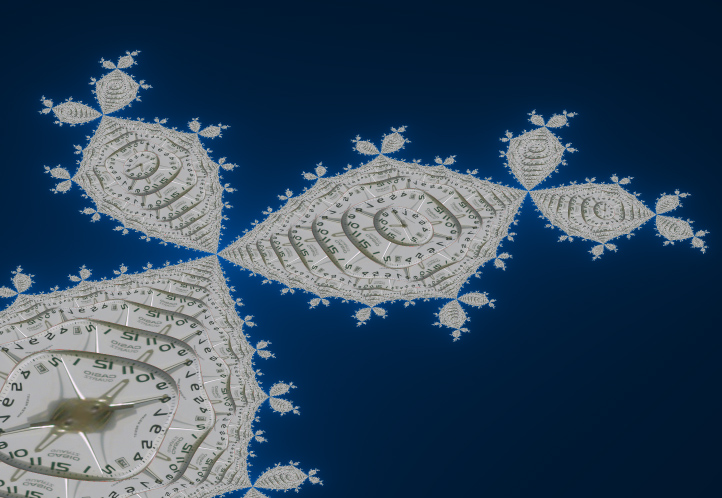
Normal placing of the Picture:
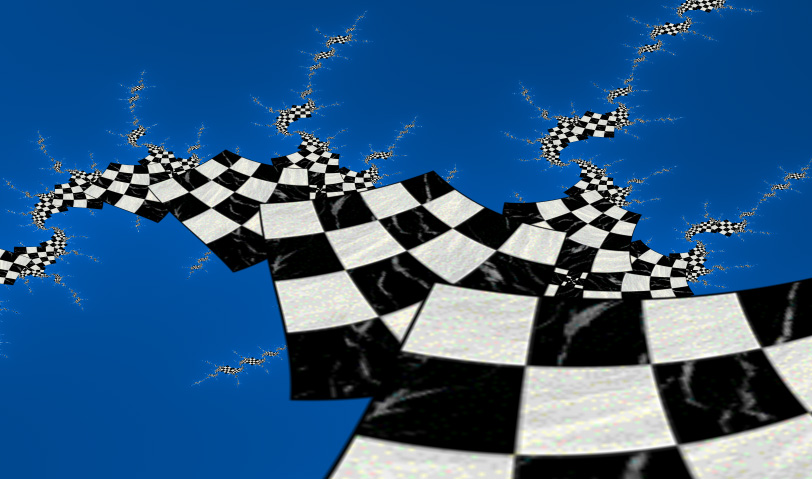
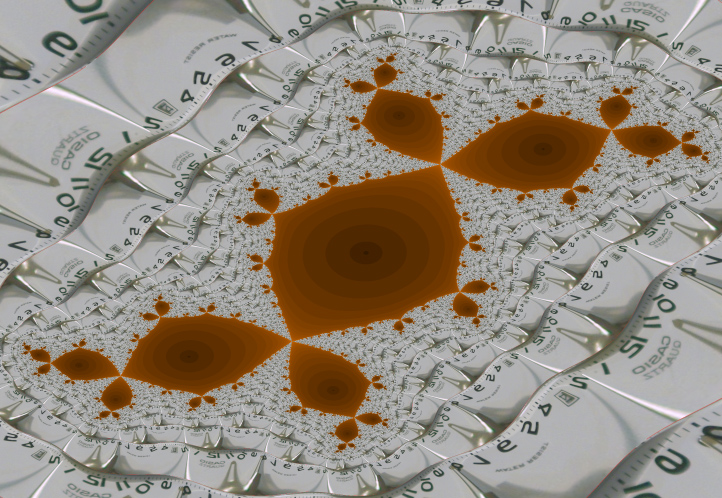
The inner space of the default Julia Fractal is filled with the pictures of the watch:
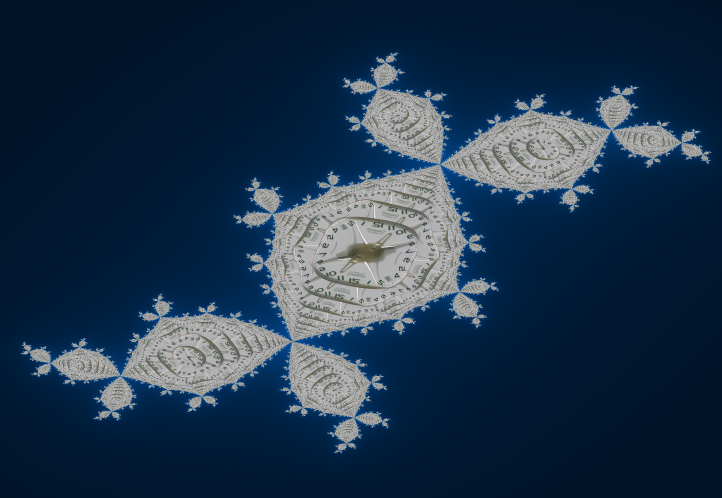
You can see that the number of numbers is doubled every layer down.
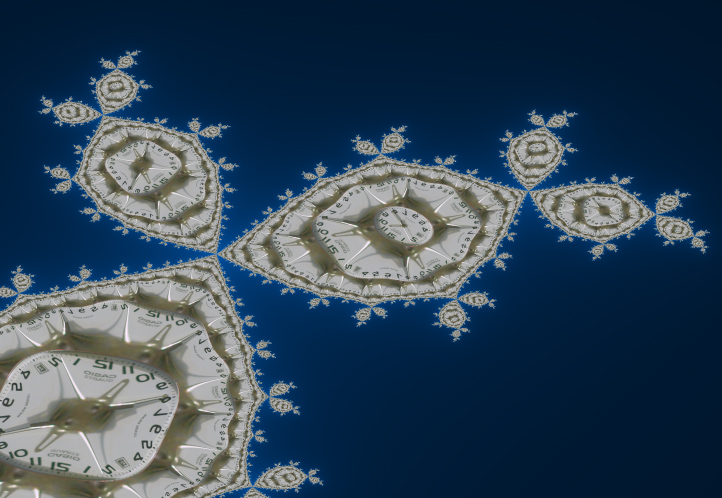
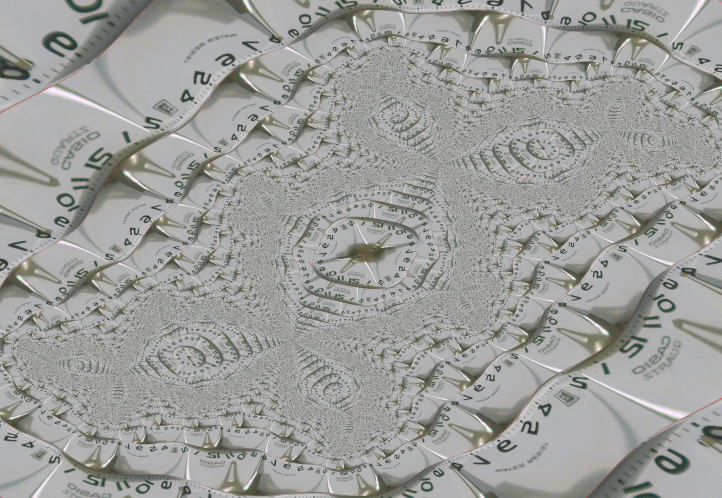
When you check checkbox Recipoke, the watch is make "inside-out", so the outer space of the fractal is filled in place of the inner space.
You can combine those two usages, by adding a second usage by pressing Append or Insert, and copy manually the settings, but the opposite of Reciproke.
Every Color has three values: red, green and blue. Each of them is between 0% and 100%. You can see a Color as a point in a color cube,
which each dimension belongs to the values of red, green and blue.
If you take two Colors, the distance of the colors is the distance of the correspondenting points in the color cube.
Because of the cube the disctance between colors can be more than 100%: 173.2%
If you imported a picture from a tif-file, the picture already can have transparant parts. You also can define a color which will be transparant when the pictures is put into the fractal, even in combination of transparant parts out from the tif-file. To make colors nearby the selected color also transparant,
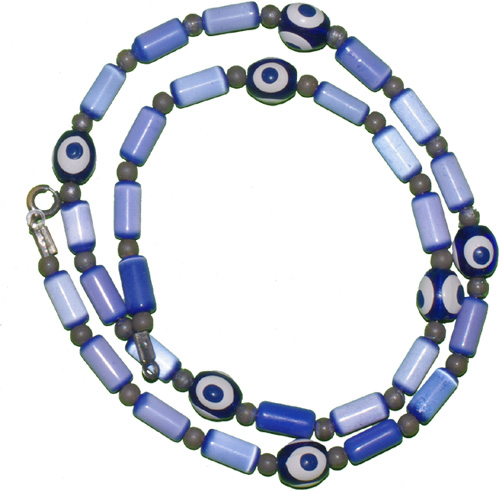
The following TIF-picture is used. It has already transparancy parts: the background is transparant:
When you put the bitmap into a default fractal, the result is:
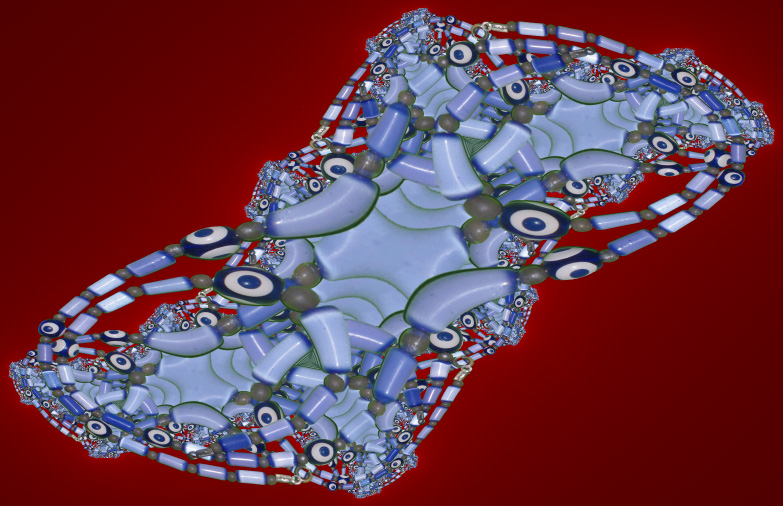
You can make some piece transparant, by specify a color:
When while walking the point touches the bitmap, there are two possible ways to define the color, in group Pixel Selection:
Where you use a small bitmap of a picture, you can clearly see the difference between the Hard and Soft Pixel Selection:
Hard Pixel Selection:

Soft Pixel Selection: