The Wavethunder has a local Clipboard where you can copy, cut, paste, swap and extract parts of the waves.
The room of every Wave Window is devided in two view by a splitter.
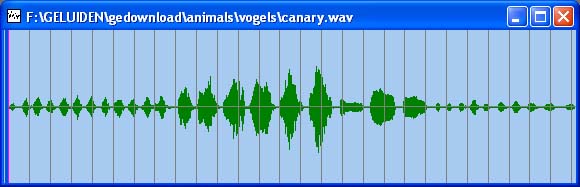
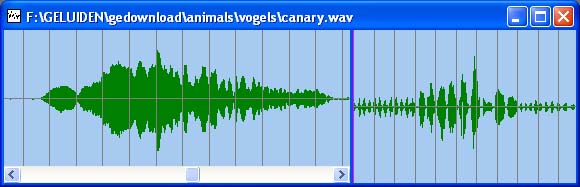
Normally you see one view, because the splitter is at the left edge of the window.
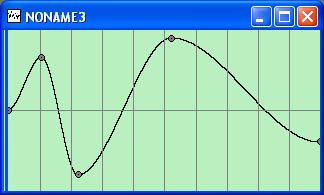
This window has the splitter at the left edge and is unzoomed:
You can simply drag the splitter left and right.
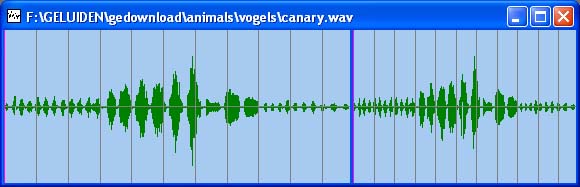
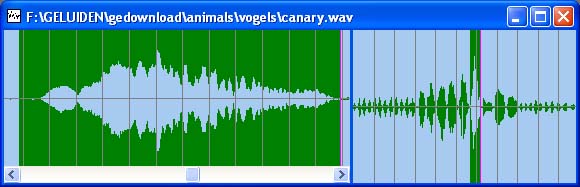
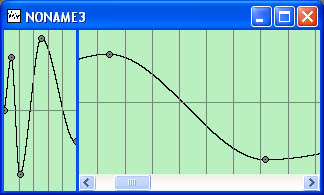
This window has the splitter in the middle, both views are unzoomed:
There are three ways to zoom in:
- You change into the zoom-mode and then select a part of the wave in a view, that part of the wave is zoomed in.
- You hold the right mouse button in and move the mouse down to zoom in.
- Specify the places of the wave in a dialogbox.
Once the wave in the view is zoomed in, you can scroll the wave in the view
with the horizontal scrollbar.
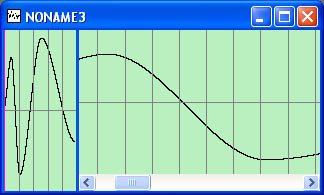
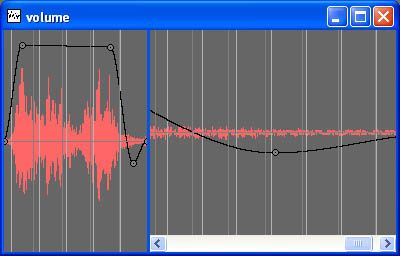
This window has the splitter in the middle, the left view is zoomed, the right view not:
There are three ways to zoom out:
- You change into the no-zoom-mode and then click in the view.
- You hold the right mouse button in and move the mouse up to zoom out.
- remove a check in a dialogbox.
When the view is zoomed you still can manipulate the wave and select a part of the wave:
With one press on a button a clone is made from a current wave.
Split and merge Wave Windows
You can:
- split vertically a stereo wave into two mono waves
- merge vertically two mono waves into a stereo wave
- split horizontally a wave into two or three waves
- merge horizontally (concatenate) two waves into one wave
You can make or add to a existing wave:
- silence
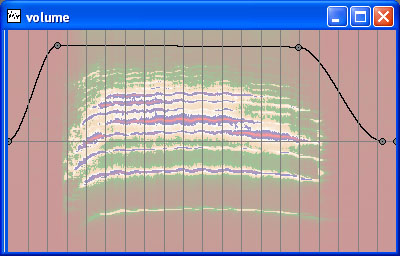
- line-wave (very usefull for envelopes)
- block- and triangle waves
- sinus waves
- noise
- multi frequencies (for example a bell)
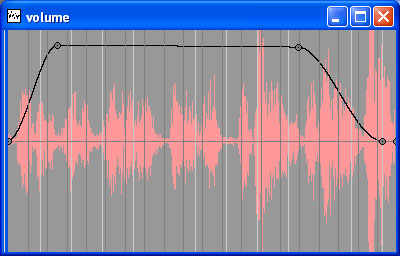
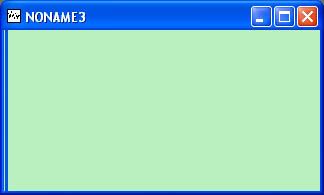 When you have a empty Mono Wave Window, you simply switch to the Draw Mode.
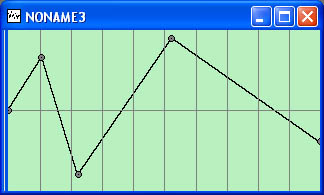
 There are two circles at the left and right edge of the
window. You only can move these vertically. By clicking in the area, you add new
circles. You also can move them, or delete them by dragging them over the upper or lower edge of the
window. In the beginning, the length of the wave is 1 second.
You can expand or shorten the length, by using the Change Length function while in draw mode.
There are two circles at the left and right edge of the
window. You only can move these vertically. By clicking in the area, you add new
circles. You also can move them, or delete them by dragging them over the upper or lower edge of the
window. In the beginning, the length of the wave is 1 second.
You can expand or shorten the length, by using the Change Length function while in draw mode.
 You can switch easily to another draw mode.
 you also can zoom, scroll, move the splitter. And you can even use some wave functions such as changing the volume or move the wave vertically.
You can this into a wave file, both the circles and the wave file itself are saved, so you later can continue this in the draw mode.
you also can zoom, scroll, move the splitter. And you can even use some wave functions such as changing the volume or move the wave vertically.
You can this into a wave file, both the circles and the wave file itself are saved, so you later can continue this in the draw mode.
 You can exit the draw mode and continue as a normal wave with many functionality.
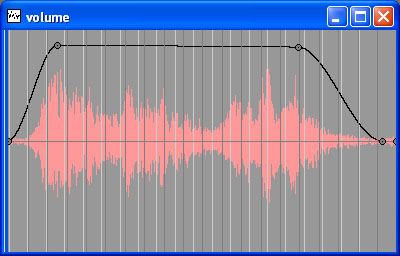
You can change the volume of a wave (or a selected part) with a constant factor or
with a volume envelope.
You can move the wave up or down the wave by specifying a value.
You can also move the wave vertically, so the mean value (height) of the wave is vertically in the middle, by one press on the button.
Move the Wave Horizontally
You can move the wave horizontally by a specified time, or by using an envelope, so the horizontal shift varies in time.
When moving a stereo wave, you can move each of the two channels independtly.
The whole wave or a selected part of the wave can be easily reversed.
Change the length or speed
The length or speed of a selected part or the whole wave can be changed with a constant factor.
Roll out Waves or Repeating
You fold the wave in to a cilinder. Using the cilinder you "press" or "roll out" the new wave.
You can roll a Wave out with a constant speed of a speed varying using a envelope. It is also possible to reverse by use negative values as
a speed factor. You can also specify the beginning of the
original wave and how long the new wave will be compared to the original wave.
You can repeat a whole wave or a selected part n times.
This is a special function. You take a cilinder and roll the wave around the cilinder, the wave is written and mixed to the cilinder.
At last the cilinder is cut and fold out, this result is the new wave.
You specify the length of the new wave, this is the circumference of the cilinder. You also specify the start and end.
Change the speed and frequency independentely
Here you can change the speed and also the frequency factor.
It is for example possible to make the frequency higher and the speed slower. A popular way to distort voices.
To distort a wave you always need a distortion-envelope.
Each value of the original wave is put at the x-axis of the envelope, the highest values
at the right the lowest values at the left, the new values are the corresponding value
at the y-axis. For each x-value there belongs a y-value. So each old value is converted to
a new value.
Both functions use the same kind of envelope or you can use a constant.
The low-filter filters the high sounds away and the high-filter the low sounds.
The can specify a border frequency together with a volume factor. Also you can specify
the count, that is how often the filter is used so that the borderfrequency and the factor
still have the same meaning.
The more the count is the sharper is the border frequency.
The resonant-filter uses two parameters which can both constant values or envelopes.
The first parameter is the frequency, this frequency will not be weakened in the new
wave. The farther away the frequencies are in the original from the resonant frequency
how more weak the volume will be. How fast it is weakened tells the second parameter.
If the values of the second parameter is high (maximal 1), the other frequncies are less
weakened. if the values is 1 the new wave will be the same. If the values is low you can
only hear the frequencies around the resonant frequency. When the values is 0, there is
silence.
The notch-filter uses the same envelopes as the resonant filter.
With this filter you can filter away frequencies around a certain frequency.
This filter is the complement of the resonant filter; everything the resonant filter put
away here it is the result.
If you mix the result of this filter with the result of the previous filter (with the same
parameters) you get the original wave.
This filter looks like the low-filter. But in addition some frequencies are filtered completly
away. which is not in the low-filter.
The filter use one parameter, this is the blocklength specified in time, which can be a
constant or a envelope.
The block is scanned though the original wave, at each step all values in the block
are middled and are put in the new wave.
All sinus waves which fit in the block exactly n times are filtered completely away.
To make dark sounds you can also try this filter.
The period echo function uses two parameters which can be constants or envelopes.
You can tell specify the period between echos and the volume factor between echos.
If you use a negative value as a period time, echo come before the original sound.
Also it is possible to specify the count of echo.
You can also get special effect when using short times.
You can change a mono-wave into a stereo wave. If you listen the sound through the
headphones, you can hear the sound from a certain direction. You can specify the
direction by a angle. The angle can be constant or a envelope so you can hear the original
sound from left to right for example.
There are choices how to generate balance:
- Use time difference between left and right.
- Use volume, a filter or none.
Time difference is the most important feature to hear a sound from a certain direction.
It is almost as real.
Mix Left and Right channels
You can create and manipulate stereo effects by mixing Left and Right channels. For example you can
create extra stereo surround (sound without mono), mono, swap Left and Right
etc. There is al listbox aviable with examples.
Time difference is the most important feature to hear a sound from a certain direction.
It is almost as real. It is also possible to apply the inverted function.
You must specify the count of echos and the room in time where waves can put in.
This can made cyclic so you cannot hear the edge between the
end and begin when repeating the result. (like wallpaper)
You can let put the waves linear (every time a equal change) or use a Random
Time envelope. The outcome of random numbers are horizontal and the time is
generated via the envelope as a vertical value. With the envelope it is possible to have
most echos at the end for example.
Normally each echo has the same volume as the original sound, you can vary the volume
of each echo linear or with the Random Volume envelope. With a envelope you can make
many echo with a low volume and less with a high volume for example.
Each echo has normally the same speed. It is also possible the give each echo a own
speed with a Random Speed envelope just as the volume. Negative speed factors cause a reversed echo.
The same story counts for the balance with a Random Balance envelope. So you can make
real applause or you are between cows if you close your eyes.
Normally each part of the random echo (time, volume, speed and balance) has own dices.
You can let some parts share one dice (at all thinkable possible ways), for example you
can have:
- echo with a low volume have a high speed
- the strongest echos at the left side
- the fastest echos in the begin and the and and the slowest in the middle
(seen in time or balance or both)
- echo coming from left to right
- and more...
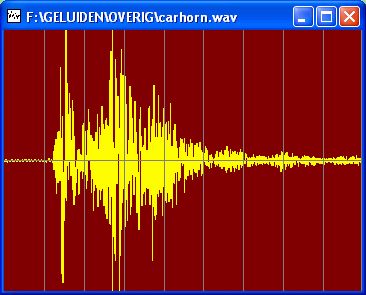
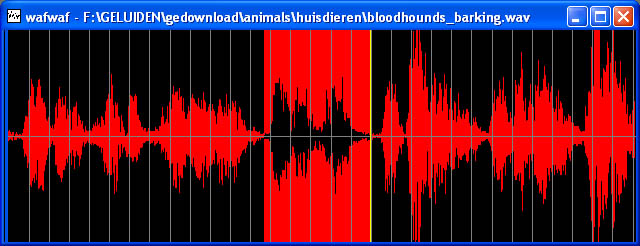
There are many ways to display in a wave form, you can choose all colors:
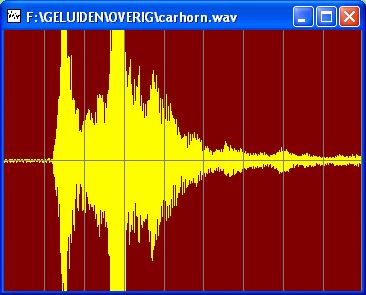
You can specify how many wave values are drawed.
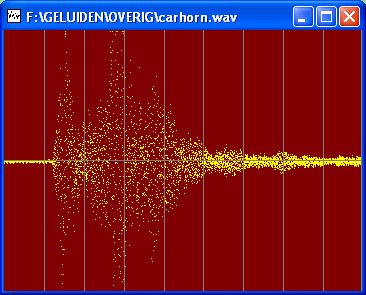
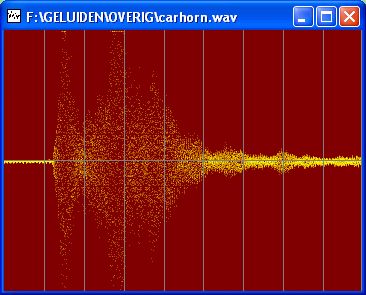
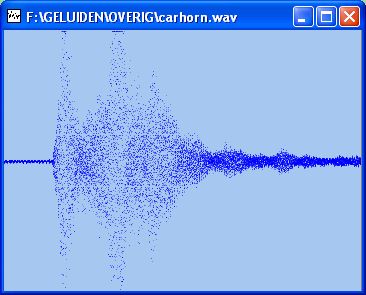
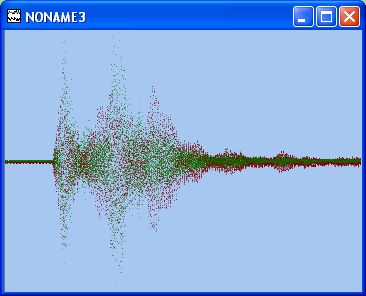
Every wave values can also by drawed by points, they can be made transperant:
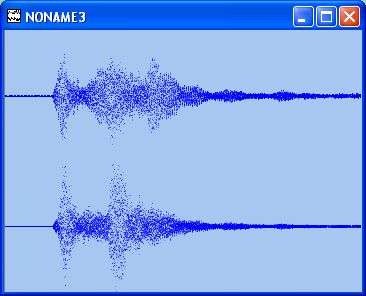
Stereo waves can be drawed as two mono waves, the first is a mono wave, the second is a stereo wave:
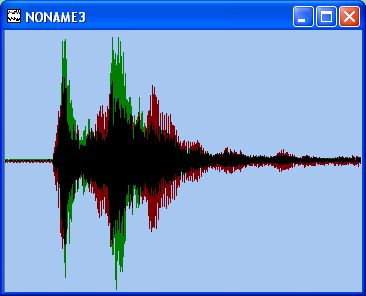
Stereo waves can also be drawed together, each one with a own color:
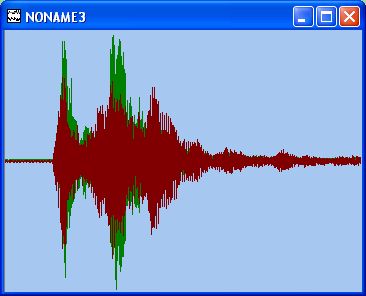
One channel can be drawed above another:
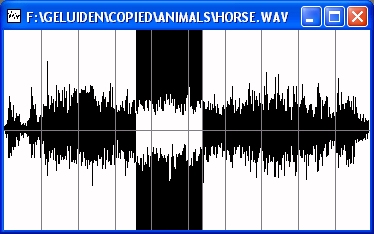
Make a Frequency Volume Diagram
Mix Colors
A Volume Diagram can be made by mixing colors with the background color.
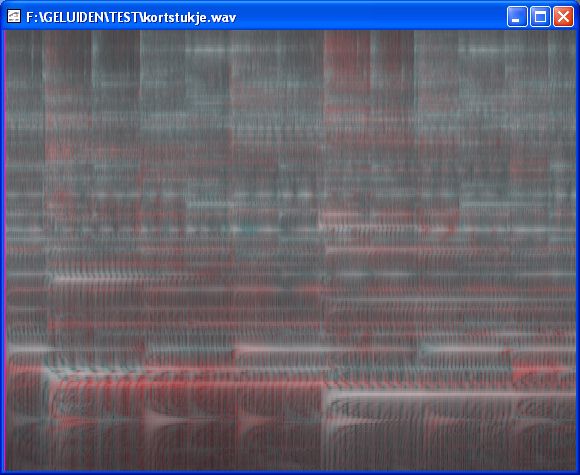
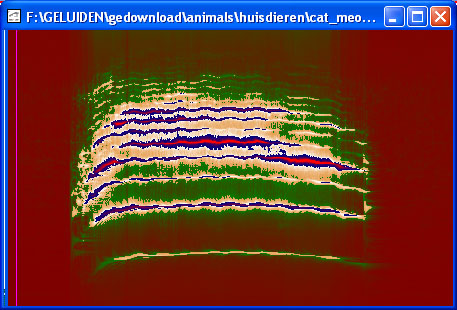
When displaying a wave at this way, you see a lot more than a normal wave picture.
Horizontal is the time, vertical the frequency of the wave. The color tells about
the volume at each point (time - frequency combination).
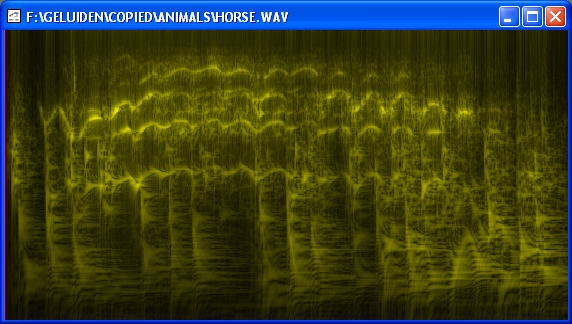
Here is a Volume-diagram of a running horse, vertical lines are footsteps, the few horizontal lines is the sound of the horse.
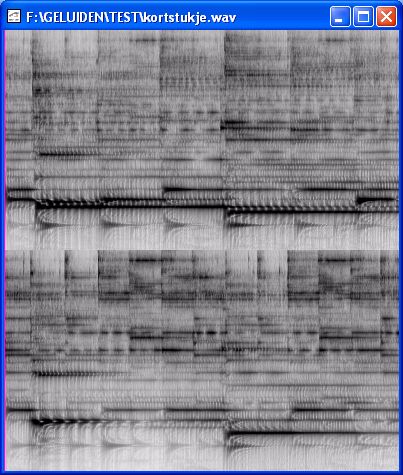
You can choose colors for the foreground and background. If the wave is stereo, you can two seperate diagrams for each channel:
If the wave is stereo, you can choose for each channel a color, and a color as a result for combining two colors.
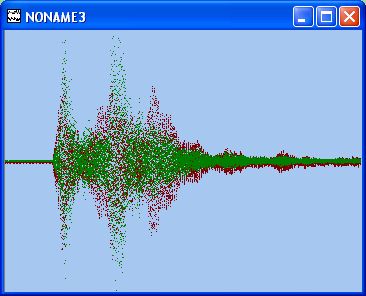
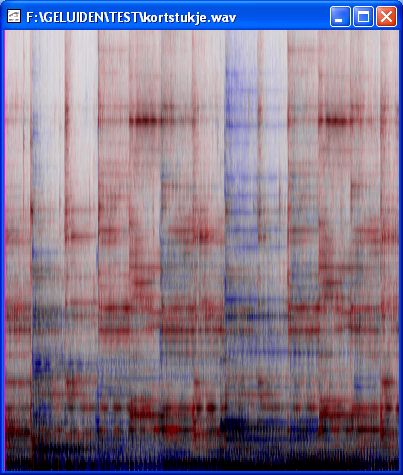
You can draw a stereowave in one diagram:
Here you can choose 4 colors. Four colors in this example are: white, red, blue and black.
The vertical scale in logaritmic.
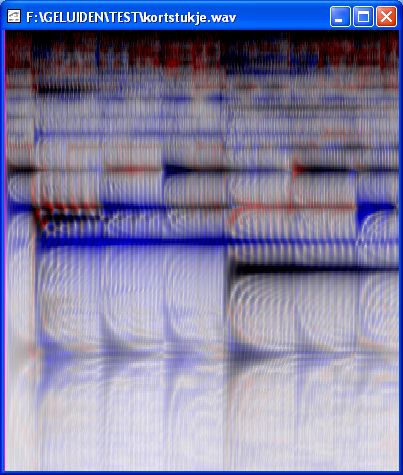
You can change the vertical scale, here the frequency is linear:
And here the wave time is linear:
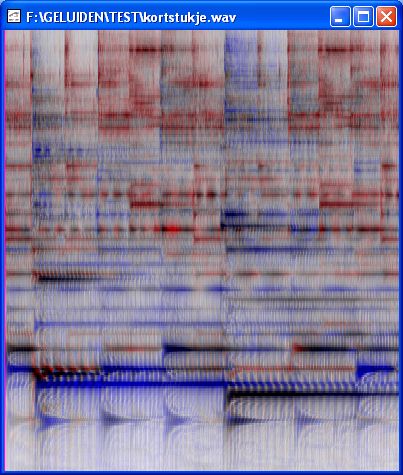
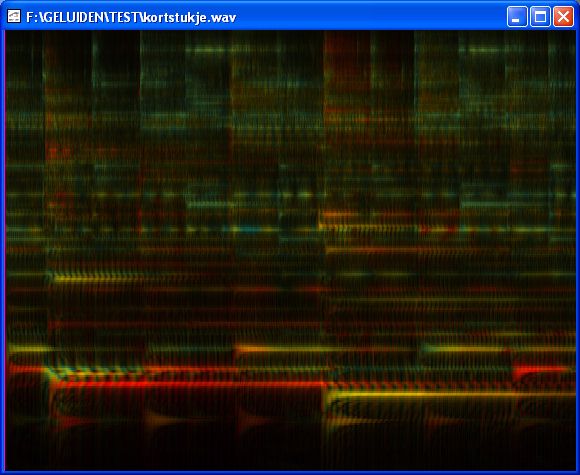
In the next example, the four colors are: black, red, teal and yellow.
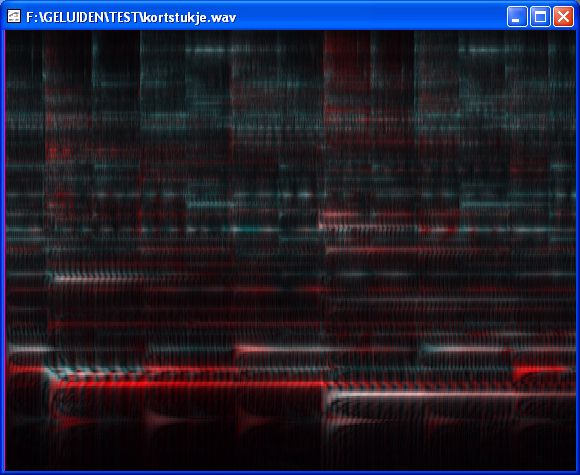
In the next example, the four colors are: black, red, teal and white.
You can also specify contrast and brightness:
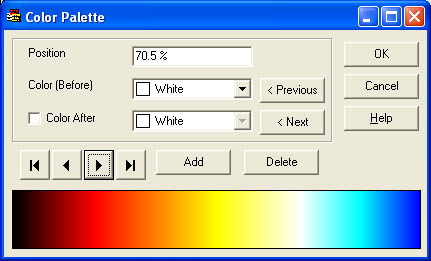
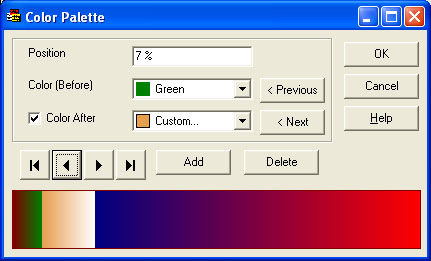
You can define a Color Palette with at least two colors,
you can add as many colors as you want, each at a own position in the color palette.
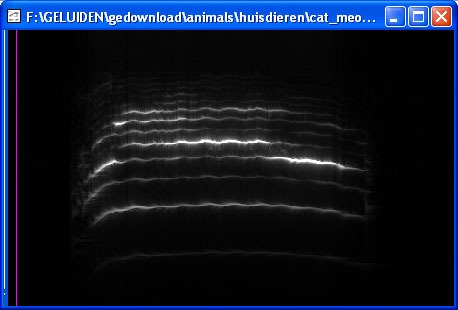
At this point, you have a mono wave with is display without using a palette.
Black is the background color and white is forground color:
Now you have created a color palette:
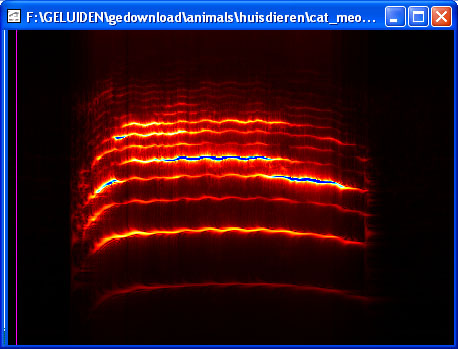
After applying the palette to the volume diagram:
You can also decide to jump from one color to another color, this palette has two jumps:
- from green to light brown
- from white to dark blue
The current selected position is on the first jump at 7%:
After applying the palette to the volume diagram:
Use another wave as background wave
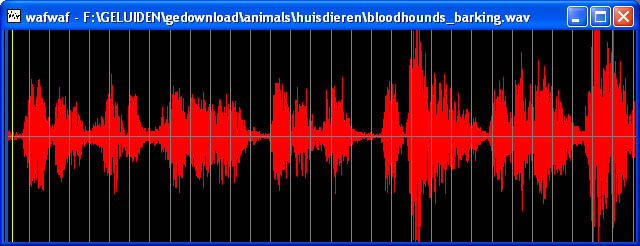
First you have a normal wave:
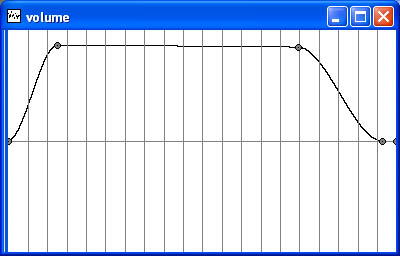
and an envelope:
You can replace the white background by the normal wave, you can choose what the strength of the background is.
The colors are mixed with the backgrond color (here white):
The background is always updated when the wave changes,
or the view properties of the wave window changes.
Because the envelope applies to the selected part of the wave,
the selected part of the wave is used for the whole background of the wave.
The selected part is visible to the background:
When using the background, you can still do anything with the wave.
Here the envelope is changed, the splitter is moved, and the right view zoomed in,
the background is made stronger:
You can also select another background: